There are a number of reasons to consider replacing your garage door opener, not least because it is broken. Garage door openers tend to last a long time which is great, however, models installed before 1993 may not come with the legally required safety reversing feature. Older models can also become extremely noisy and are ultimately more susceptible to thieves.
If you’re thinking about changing your garage door opener, it’s advisable to buy a replacement of the same brand as your current. This means you’ll have one less job to do when it comes to fitting it, as you can keep the mounting equipment you already have.
What You’ll Need
Ratchet and Socket
Wrench
Step Ladder (two if possible)
Cardboard box
A helper
Screwdriver
What To Do
Detaching the Bracket
1) Before removing your garage door opener, it’s first worth taking a note of your current settings and wire placement, so that you can wire-up and adjust your new opener quickly.
2) Having done this, you can begin the replacement process by detaching the bracket. Follow the rail to the end where there is the manual pull handle, this will be attached to a bracket. Using a ratchet and socket, remove the bolt or screws that secure the bracket to the door.
4) Repeat this process, removing the nuts and bolts that connect the bracket to the rail.
Detaching the Motor
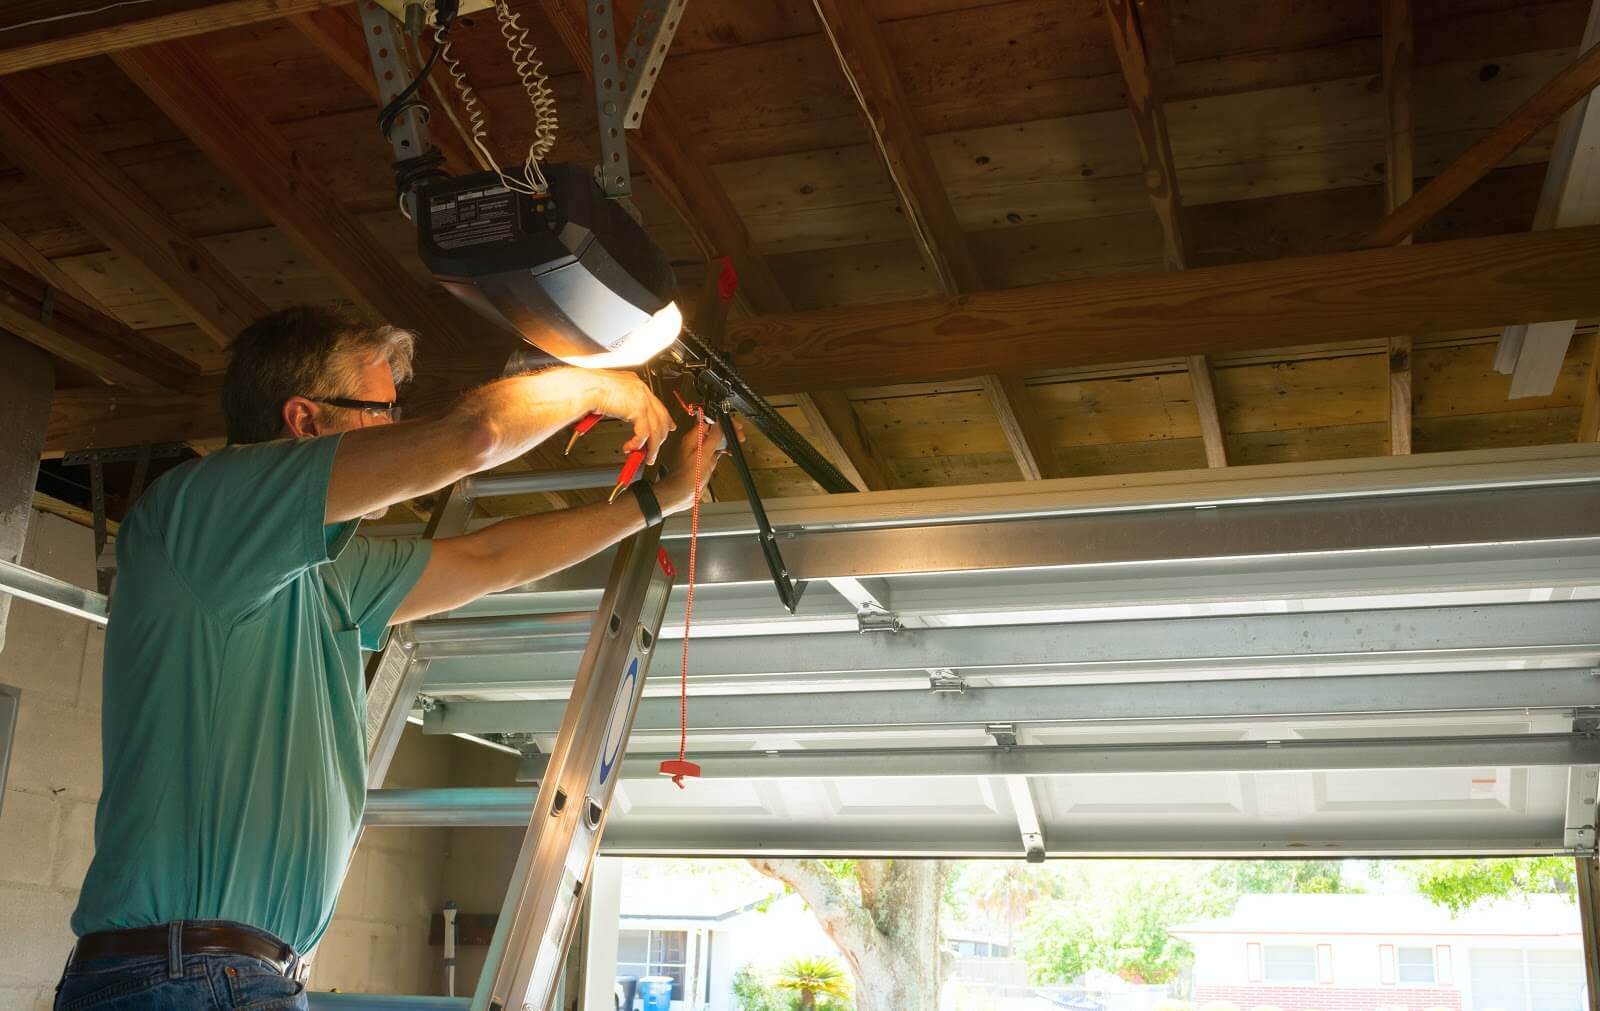
5) If you’re doing this alone, it’s a good idea to position a stepladder below the motor, placing a cardboard box or something similar on top of the stepladder to support the weight of the motor and prevent any accidents.
6) Unplug the motor from the mains. Remove the safety lenses at the sides of the door by loosening the screws that secure the wires. Repeat this process with the wires attached to the motor.
7) Using the socket wrench, remove the nuts and bolts from the bracket that attaches the motor to the ceiling. The box underneath will support the motor.
8) Whilst supporting the motor with one hand, you should now carefully remove the box and stepladder from underneath, lowering the motor to the ground. As part of this process, you should pull the rail away from the bracket that is holding it in place above the garage door.
Constructing the New Opener
9) Begin assembling the new rail and motor as per instructions provided by the manufacturer. The first rail will fit into the motor of the opener.
10) Most manufacturers then instruct the customer to connect the rest of the railing using bolts provided. The chain or belt will sit comfortably inside the rail.
11) To turn the opener off, you’ll need to attach the stop switches to each end of the rail, 12-14 inches in.
Installation
12) You’re now ready to insert the end of the new rail into the bracket above the garage door, be sure to fasten it tightly with the correct bolts or clevis pin.
13) Ask somebody to give you a hand with this part, as you need to lift and mount the new motor into the same position as the previous one. Whilst securing the motor, you’ll need somebody else to hold it in place. If you don’t have a partner at hand, you can use the box and stepladder trick again. Make sure the rail is also supported.
Check that the motor and rail are level before you fasten all nuts and bolts tightly and securely.
14) Attach the wires following the notes you made earlier. There should be a wire from the motor, to the push button control and wires to the safety lenses on both sides of the door.
New motors always come with new safety lenses, as you should never reuse old ones, which may not work on the same frequencies as your new equipment.
Make sure the wires are kept separate from the moving parts of the garage.
15) Finally, you need to refit the bracket that connects the rail with the door and then reattach the bracket to the rail.
16) Test your new opener, checking that the safety lenses are aligned and the stops are properly positioned.
If you do struggle with any of the above steps, you should consider calling in professionals like SDM garage Doors. Get in touch with the team today.